Social Media

Showing posts with label wrought iron balconies. Show all posts

Tuesday, May 28, 2013

NEW WEBSITE!

Hey guys!

We finally launched our new website over Memorial day weekend. We could not be happier. It took quite a bit to start it up and now our job is to announce it to the world!!! It's was a bit scary since we had the old website  for about 7 years! (it was about time we changed it though) May it RIP.


This new website has great features for us an our new/current clients. We are able to take more online orders and the CRM is amazing. Our customers can track their orders, check the status, look at pictures of their job being completed...etc. Another thing we are very exited about is our Contractor feature. We love working with contractors and builders, therefore we have created a new program for Contractor/builders. If you are one, please contact us to fill out an application to receive special pricing.

Here is a pic of our storefront right now.

iron railings


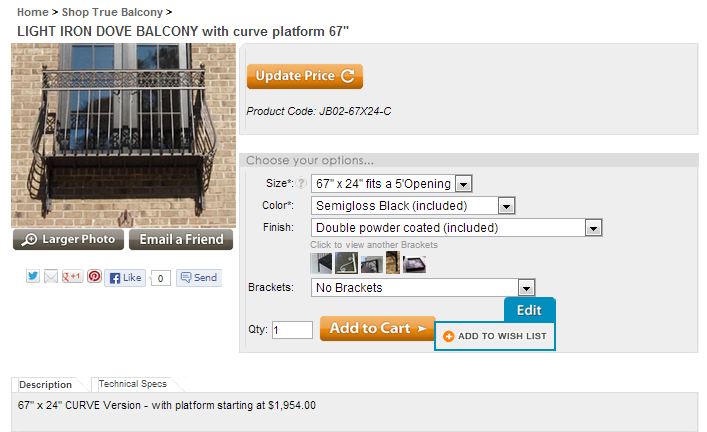
We kept the railings page with the same format. We changed the balcony ordering process, now it is much easier. 

Well hope you guys liked the new website. If you find anything that you see that is not working or needs improvement please let us know. Contact us at 1-877-803-2282 or email us at deciron@bellsouth.net. Any input will be greatly appreciated!!!

Priscilla
Deciron


Thursday, January 17, 2013

All About Wrought Iron Railings - Article Post

By:  Pedro L. Sanchez


Related link:  www.deciron.com

RAILING SYSTEMS
“Railings” is a term applied to the structure that is installed alongside a staircase a balcony or a deck for safety purposes. Generally speaking, a railing system would be installed on the edge of a deck or a stairway; however this is not a fixed rule. The railing could also just provide enclosure, or simply separation to an area within a building or house. Commonly used synonyms are banisters, balustrade, guardrail, handrail, veranda, or simply rail.

RAILINGS COMPONENTS
Railings basically consist of 2 or 3 horizontal rails, somehow connected together to form a rigid structure.
The top rail is usually referred to as hand rail, and is the part that is accessible to hand grabbing. The handrail is usually placed at waist level, within 34 and 42 inches or 87 to 107 cm, from the floor, depending on the application, and code requirement. The bottom rail is usually placed 2 inches or 5 cm above ground level and serves as foot rest when a person is leaning against the railing.
The most common method of connecting together both, top and bottom rails is with straight pickets or balusters. However there is limitless materials, designs and forms that could be used for this purpose.
Railings are usually installed in between posts and walls, but also may include posts that are provided as part of the railing system.  For longer spans, manufacturers usually provide in- between legs that just connects the bottom rail to the floor.
To connect the railings to house pillars and walls, the railing system includes weld tabs, for metal railings and rosettes and brackets for wood railings.

CONSTRUCTION CLASSIFICATION AND CODE REQUIREMENTS
Residential railings
By the international building code and its interpretations by the different municipalities, it is common that residential railings are to be at least 34 inches or 86 cm high from the floor to the top (the value 36 inches is what is normally used within manufacturers), and are required to be installed if the deck area is above 30 inches from the ground, and the balusters (pickets) have to have a maximal separation of 4 inches in between, and the width of the top rail should not exceed 2  5/8 inches in width.  They also have to be built sturdy enough to allow a horizontal force of 200 pounds. Normally this criterion is just hand tested by the city inspector. In case of wall mounted railings, most of the time they are required to be continuous and to end against the wall. However in some places the wall return is not required. The minimum height requirement is 30 inches or 76 cm. In staircases, the standard 36 inch height is measured from the tread nose, vertically to the end point of the top handrail. When the staircase is open at its steps, it is generally required that they don't allow a sphere of a maximum of six inches diameter pass through, if a bottom plate is provided. If that is not possible, the balusters should be attached directly into the steps.


Commercial railings
Commercial buildings have a different code treatment, based on the fact that they are open to the public and liability issues play a greater role.
Therefore, commercial railings that act as guard rails are required to be at least 42 inches high from the floor to the top of the handrail. In case of a stairway railing, the same requirement applies; however, a side mounted railing at a maximum of 36 inches is required. It is also a mandate to provide an extension at the lower end.
All the other requirements are the same as the residential code.

MATERIALS CLASIFFICATION OF RAILINGS BY THE CONSTRUCTION

Wood railings
Wood railings are the most common type of railings used on decks and interior stairways.  A carpenter can easily craft a deck railing using regular lumber purchased in any hardware or lumber store. However, one can find readymade components for wood deck railings.

For interior stairways and interior balconies, there are specialized companies that produce all the components needed. Handrails and pickets are manufactured in different shapes and in different types of wood.
There is also a wide selection of newel posts, terminals, rosettes and brackets that can be purchased and assembled on site. Steel balusters are also combined with wood tops and connected directly into the floor. This application normally applies to inside railing systems.  


Iron Railings

The second most used railings type are iron railings. The term iron refers to commercially available mild steel.  Strictly, an iron railing would be a cast iron railing, however the term applies to the common mild steel railings.
The biggest advantage of installing an iron railing on a deck is that the view is not interfered, because it is possible to manufacture them using narrow-width profiles, like ½ inch bars or tubes, and at the same time get the same sturdiness and security of a wood or vinyl railing.

Iron railings are long lasting, and with proper maintenance its appearance does not change with time, as wood railings and aluminum railings do. A well painted iron railing will last forever. Iron railings and Aluminum railings can be classified into these basic categories and subcategories:

Standard picket railings:
This is referred to a plain picket railing, with two rails one at the top and one at the bottom. Light ornamentation could be included under this classification, in most cases overlay picket castings placed every 2 or four pickets.
Usually a 1 ½ inch channel or plate is used as a top and bottom railing. However one inch square tubing is also used and on the top rail and a molded cap, called “Dixie cap”, is commonly  installed on top of it. Another approach is the use of rectangular tubing, usually 2x1 but also 3x2 tubes, especially for the top rail.


Ornamental picket railings:
This term refers in most cases to a railing with ornamental vertical pickets, which could be twisted pickets, hammered pickets, scroll pickets or combination. The rest of the constructive specifications could be the same as the standard railings, however, in many cases thicker profiles are used, like 1 ½ inch tubes and 2’ or 2 ¼ ‘ cap rails for a bulkier appearance.
Ornamental pickets used to be commonly manufactured by the railing maker; however, in recent years there are specialized companies that sell readymade ornamental pickets in different thicknesses and designs. As a general rule, a bulkier railing will be more ornamental.

Decorative railings
The term “decorative” applies to a higher level of ornamentation; therefore it is referred to railings that have fancy scroll pickets or hot forged scrollwork made by a professional blacksmith. Most of the time decorative railings are used inside, and in combination with wood handrails, golden stained, aged, coppered, brass or metal top railings.


They may include hot forged terminals at stairways starting points.
These types of railings are seen only on high end mansions, because of its prohibitive cost.
The finish is also something characteristic of decorative railings. Scrollwork, newel post and terminals usually include golden or copper accents.  A vintage look is also accomplished by “rubbing” and “glazing” techniques, and, surprisingly, sometimes the iron pieces are just left outside to rust and afterwards a clear coat is applied, to get a “rusty” look.


Cast Iron Railings
The term cast iron refers to the material those results from pouring melted iron into a fabricated mold. The resulting piece is a cast iron piece. The prime material comes directly from the mines and has not been treated for malleability. Therefore, cast iron is brittle and brakes easily, it is though very hard, and requires a special nickel alloy to weld it.  Cast steel is, on the other hand, made with the same principle, but the controlled carbon content of steel makes a more durable piece. The prime material is normally scrap steel, that is melted and poured into a mold.


Cast iron railings are, in most cases not poured as one piece in a mold, but they are fabricated by combining steel tops and bottom rails with cast iron pickets or balusters.
Cast iron is very versatile in terms of getting intricate designs with scrolls, leaves, grapes, pineapples and other limitless forms. It is very cheap but not so cost effective for the following reasons:
*It requires a very expensive welding electrode to weld it properly, if not the weld will brake    easily.
*It is heavy and brittle, which makes transportation difficult.
*It is hard to cut and work with.
*It rusts faster and it is more difficult to paint.

However, if one wants to get a medieval looking railing, cast iron is the right choice.
Cast iron posts are very beautiful and low cost.
Cast steel is weldable with regular electrodes; however, its cost is substantially higher than cast iron.

Related links
* http://www.decironstore.com

How to Install your Wrought Iron railings from Deciron

Thursday, September 27, 2012

Picture Day at Deciron

Hi guys!

Most of our clients are not from Charlotte, NC and have just talked to us on the phone. If you have ever wondered how we look like, you are in luck! Today was picture day at Deciron. Here you can put a face to the name :)

Josh - Warehouse/Shipping Manager
Don - Customer Sales Rep.

Daniel - Computer Drafter

Priscilla - Bookkeeping


Epic picture of the office guys and some of the warehouse guys.


Pedro L Sanchez - Engineer / Owner


Decorative Iron is a family operated business. We are so lucky to have this business in these tough times, and we are very grateful to all of our wonderful clients that make all this possible.

In case you want a close up of the super sweet chocolate brown light iron dove balcony, here it is:
Thank you for reading! We are also going to update our About Us page at www.deciron.com and probably add this balcony color to www.decironstore.com. If you have any questions about or products please let us know, our main email is deciron@bellsouth.net.

Friday, August 12, 2011

How to Install your Wrought Iron Railings


Hello Bloggers,
Here at Deciron we ship to other states, the customer installs their own railings. We ship them ready made, no welding necessary products so they can just install them themselves or get a handyman to do it. In this blog I've put our detailed instructions to install the railings. If you have ordered from us, or thinking about it, this article can help. We will also post it as PDF later on as a link to our site, for better use. 


HOW TO INSTALL YOUR RAILINGS

Thank you for buying your railings from us. We made sure they were welded properly and powdered properly, so that they would last you for life, now we want to make sure you know how to mount them. We are in a life saving business, but we are not saving anyone if your railings are not safely installed. Once you have received your railings from us it is important to follow the right installation procedures, to ensure that your railing is safe.

LOAD REQUIREMENTS

The International building code requires that a guardrail withstands a minimum of 200 lb, applied tangentially to the top rail. This means that a person or a few persons leaning against the rail could eventually apply a tangential force equal to 200 lb and the railing should be able to resist. There are several factors involved on this. However, the only factor that virtually does not count is the type of railing, because, for the most parts railings are build following common practices, and they are usually just ok. The main factor for code compliance is the quality of the installation. If one does not attach the railing properly, even if the railing is made of thick solid steel, it will not pass the 200 lb test. It does not make sense to build an iron railing that will probably need a force equal to 1000 lb  just to slightly bend it and then leave it lose against the wall! But this is what happens most of the cases when a railing has failed.

TYPE OF WALLS AND THE PROPER ANCHORS FOR EACH OF THEM

There are several type of “walls” where railings are usually attached to.

EXTERIOR BRICK WALL
Normally this type of wall has regular wood framing behind, and the brick is just attached against it. If you want to be over cautious, you may drill through the brick with a masonry bit, up until  you reach the wood behind, and then predrilled the wood to drive a long  enough 3/8 inch lag bolt into it. However by experience it is possible to use expansion bolts, 3/8 by 1 7/8 and install them into the brick and still have a strong enough grip. If the brick is lose or cracked, you may have problems. Also if you open the hole too much, the expansion might be lose or loosen up with time. Another possibility is to use concrete tap cons, which is a blue screw that is very strong. I would prefer the expansion sleeve anchors over tap cons. However, properly installed, tap cons are just fine on brick. Just be careful not to overdo while driving in the tap con, just go easy. If the brick is not dense enough, tap cons might not work. So just make sure you have a healthy solid brick to work with. If not you will en up going back to plan A. Do not use any type of anchors that would require impact, for it might break the brick, causing a greater problem.

WOOD FRAMING
Outside wood framing always has a 1/2 inch OSB plywood behind the siding. However you do not want to attach your railings to the plywood only, but to the real wood framing behind. You might get away installing the rails to the plywood only, but for sure, if the railings are high traffic, they will fail. If the building inspector catches that, you will fail inspection.

But not all the time, sometimes you could leave, in good conscience, the rail with a weak joint (not lose) on the top, if you there is a post near to the wall and its four floor anchors are well attached. Actually a good post attachment would waive the necessity of an upper anchor, your railing could be left free standing, and still pass the load test.

As an installer you have the right to request that the proper wood backing is installed on the walls. Inside framing, on the other hand, is covered with drywall.  A drywall anchor will not take the load, even less than the OSB. So, don’t install your railings on drywall.

However there is two exceptions to this rule: the first is the one we already mentioned, and the second is that if the railing is a wall mounted railing only, and let say you have 4 brackets, and one is on drywall, it is going to be probably ok if the bracket is not at one of the ends.

Concrete walls and floors
The recommended anchor for this cases is always a sleeve anchor, 3/8 x 1 7/8. Some times it may require a 3/8 x 1 ½, or even more it is a long standalone railing. Tap cons are also ok in short runs. When there is greater danger and appearance is secondary, the best way to go is to core drill the concrete and then embed the legs with hydraulic cement. Of course if you could have the railings ready before you cast the concrete and cast them along, that would be the ideal situation.

Railings joinery
Sometimes the railings need to be split and then joined at installation. The best joint is the welded one. You bring your welder, grind the spot, welded up and then touch up paint. However, if you paid for an expensive powder coating finish, you don’t really want to weld on it, unless it is completely necessary. Bolting is a second option, which requires a nut on the other side. It is good but too conspicuous. Specially if one does not grind off the excess tread and leaves the bolts un painted. If this is your case make sure the nut is tight enough and then seal it around with clear silicone to avoid moisture penetration. Self tapping screws with a neoprene washer is the best option. Screws are not so visible and provide a very strong joint, which is also waterproof. Way to go! 

When installing the self tapping screws go slow with the drill, making sure it is NOT in hammer mode. If you go too fast it might kick you back and cause an injury. So be careful. Remember that at slow speed the drill has more torque, so you are not doing much more by speeding up too much. One thing to remember is that it is better if you clamp the two pieces together before drilling, and that this is the last step. Make sure everything is lined up and attached, and then install the joint screws.

INSTALLING ON CERAMIC TILE OR SLATE
Here the problem is that ceramic tile or slate break easily, especially if there is a hollow spot. First of all, make sure you tell the owner of the house or your wife that this might happen, it will keep you out of trouble. Then, always try with a thin ¼ inch bit and then go with the 3/8 or ½ inch one, and make sure you use long enough screws to reach the wood or the concrete underneath.

GLUEING DOWN YOUR RAILING
Sometimes there are worries about damaging the waterproofing of the deck, if that is the case and face mounting is not possible, for short spans, when there is a solid attachment of the top railing, it is possible to glue down the intermediate legs and even the posts. Use 1099 glue by 3M, which is much better than regular contact cement.

FACE MOUNTING YOUR RAILINGS
If for any reason you decide to face mount your railings, just remember that there is a lot of momentum on this type of mount, therefore the minimum spacing between bolts vertically should be 3 inches. Both screws need to be strongly attached, with a minimum of 2 ½ inches of real wood penetration, therefore there should be 2 boards on the mounting face. Therefore use 3/8 by 3 wood lags. If you don’t have 2 boards, you need to have 4 screws per leg. The best way and safer way, would be pass through bolts with washers, if you have access to the back of the face. Use 3/8 of an inch bolts.

If you are face mounting on concrete you need a 3 bolts with a separation of 3 inches in between, and you need to use 3/8 x 3 sleeve anchors. If the slab is not thick enough, then don’t face mount, unless you are allowed to have kickers every 6 ft minimum. I think I have covered all the possible scenarios; so, the only thing left is to say: Happy railings installation!

Pedro L Sanchez - (owner)
Decorative Iron of NC INc.
www.deciron.com
www.decironstore.com

Example of a light Iron dove installed on Brick

Cubist Balcony installed at our warehouse.